Tuesday, December 7, 2010

Posts!

Ok.. I give up with the bloody pic utility on this blog site.. It will _not_ allow me to post images that can be opened to a larger format. The thumbnails it generates are apparently all that it does now.. sooo.. photobucket it is!

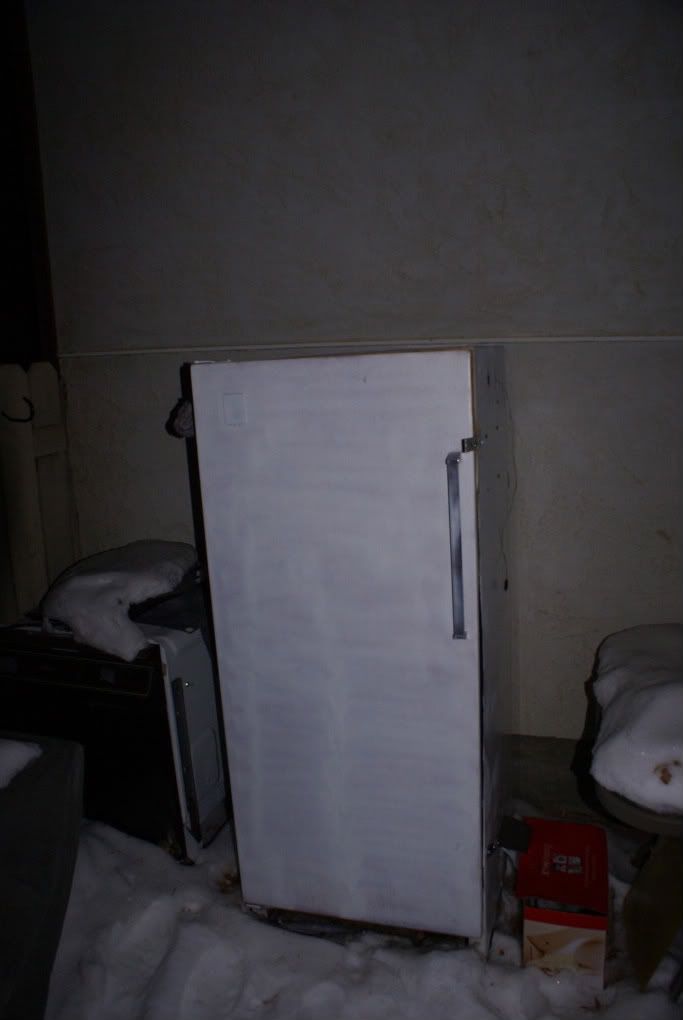
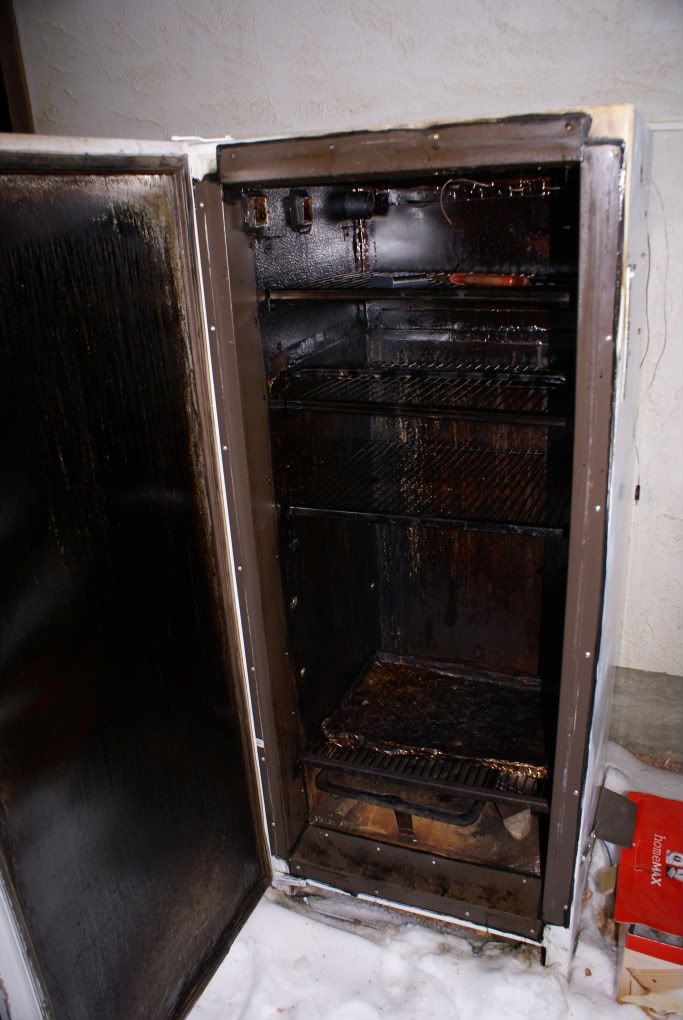
First up, pics of the smoker! Ugh.. and now photobucket is messing with me.. I cannot.. for the life of me.. flip these images upright! They look normal on my computer and as soon as they go online, they're sideways! Argh! Ok.. so if I rotate the original and then save a copy in photobucket... the original turns into a misshapen blob.. and the copy is fine... >.<


*gasp!* What a bloody fight to post links to two lousy little images.. yeesh...

Now for part 2! I'm always looking for new things to cook that are tasty, so I came across a good recipe for Ramen soup. For the uninitiated, ramen is Japanese egg noodles in a specific soup broth with a variety of toppings and condiments. Ichiban noodles that you can buy in the store are the cheapo quick version of ramen.

So.... some top quality soy sauce, scallions, hard boiled eggs soaked in mirin (sweet sake - rice wine) and soy, a shitake mushroom base for the soup, and a few more goodies added in and we have a definite winner! 30 minutes prep time for the soup base which can be frozen or refrigerated, and 30 minute prep time overall for the actual meal and is it ever tasty!


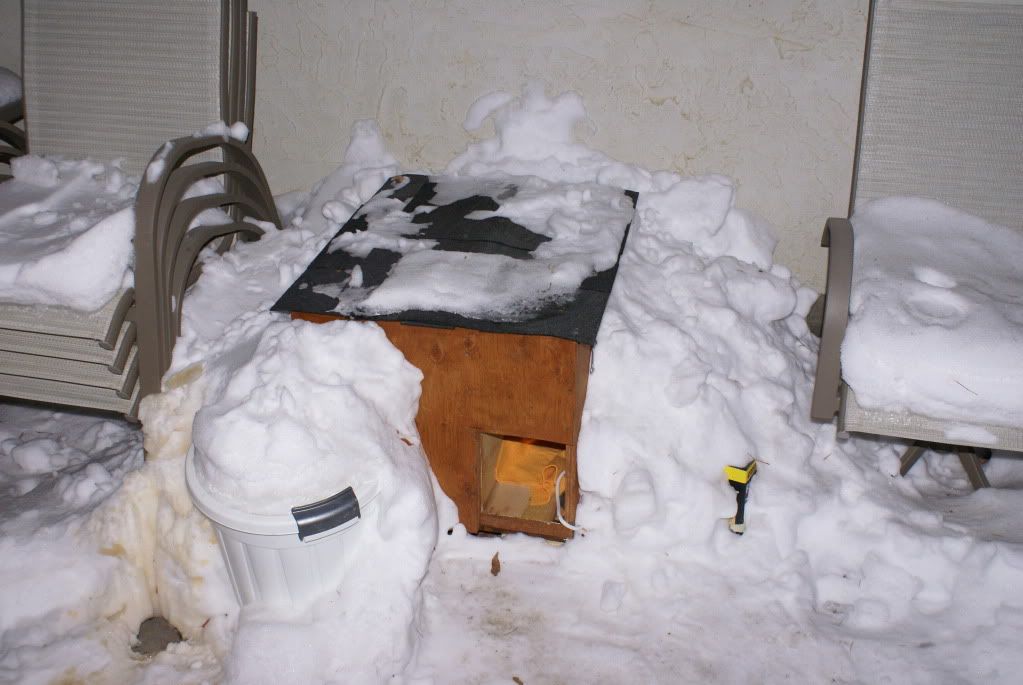
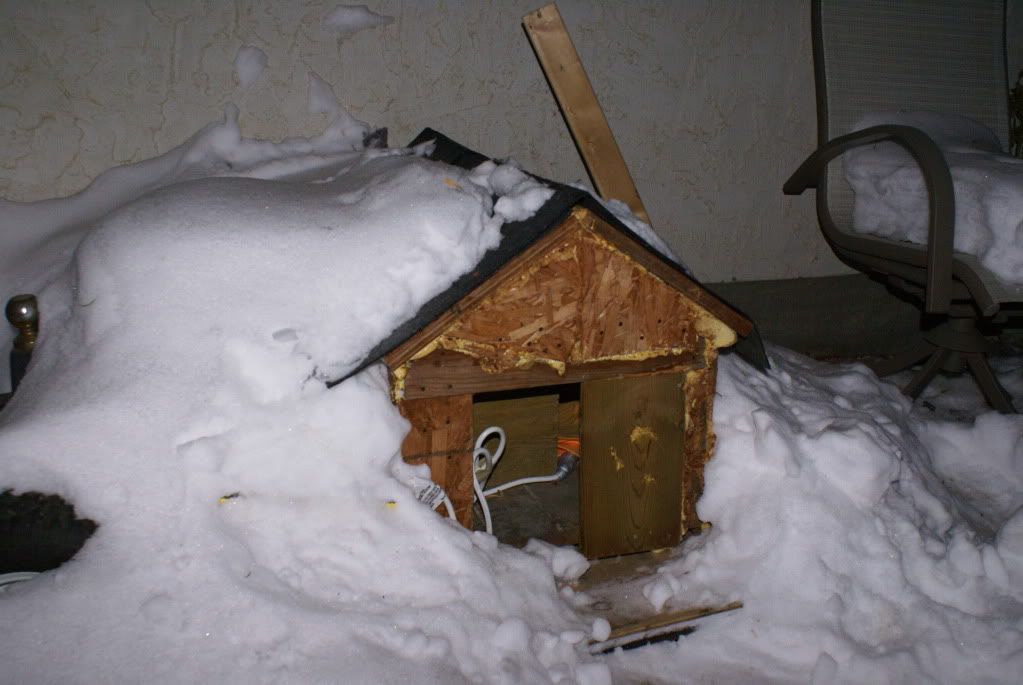
And finally, the last part of the post. I've been working on refinishing some furniture for our next door neighbour (nothing too special.. the pieces are not terribly well built, so not much to really say there) but in between times I added a couple of things to the yard to deal with a persistent problem in our neighbourhood.

For the longest time we've had trouble around our place with people letting cats outside in absurdly cold weather. The worst offenders are the low income and Treaty 7 (Urban Indian) houses around us, including letting an 8 week old kitten outside to fend for itself. The kitten we rescued from a pair of tomcats and sent to a better home at friends of ours in Vulcan. Generally the cats vanish in early Fall and reappear in the Spring, they obviously have homes somewhere. This winter was a bit different though. Two cats would come and visit us consistently, one being a little tabby female who was very friendly and terribly fierce towards leaves and dead grass :P The other was a young orange male who is very afraid of people, but will sit under the car or trailer and cry if you come outside and startle him.

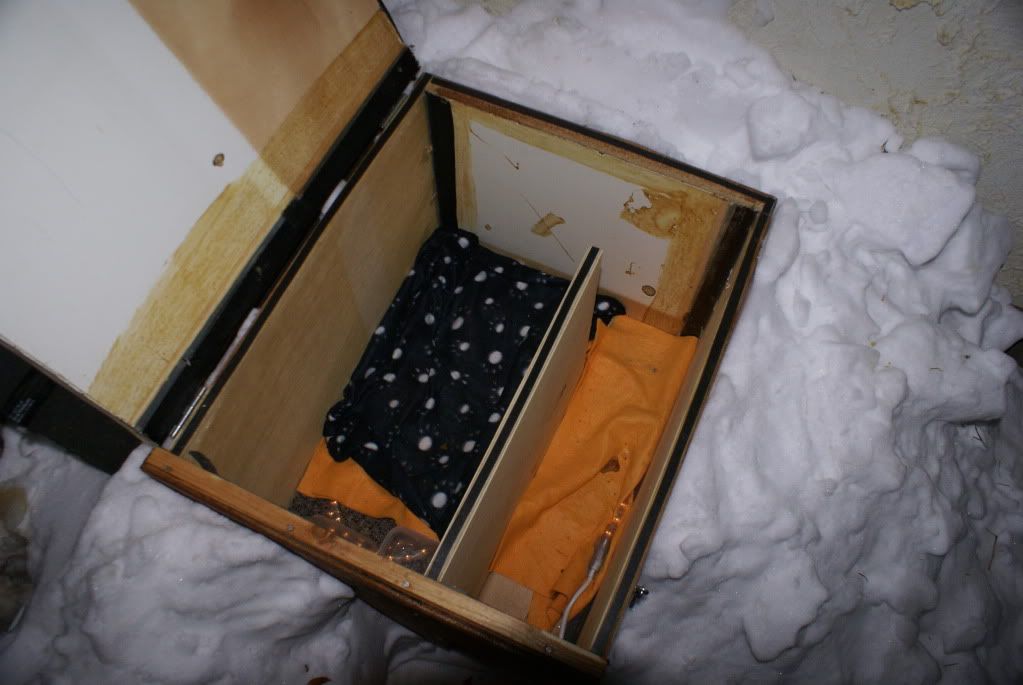
Needless to say, even when the weather got cold neither of these cats seemed to have anywhere to go so I took steps and built a pair of "kitty-bunkers" from scrap wood I had floating around the yard. The tops are shingled and flip up so I can get inside and add food and water, and packed around with snow so that they insulate well. Inside, the door is offset from the main area so the wind is cut to nothing and some of the heat is retained, and I put a $6 rope light into each one. You're not exactly supposed to use a rope light for a heat source, but they're warm to the touch rather than hot, and warm enough to keep the water in a container sitting directly on top liquid at -35 Celsius. Best of all, they're sealed acrylic, so they're completely weatherproof.

Judging by the footprints around the bunkers, and the empty food and water dishes that I fill up every 3 or 4 days, my efforts are appreciated, and we've seen both of the cats going in and out of them. Best of all, after our weeks of super cold weather, both cats have the tips of their tails and ears intact.. so it's warm enough in the shelters to prevent frostbite as well :)

Total cost to me?

$4 a month for cheap dry cat food
Power consumption... 2@15w x 744h = 22320/1000 = 22kwh x 0.08/kwh = $1.76/month
Water - negligible.. possibly a liter a week
3 hours to build them both using scrap wood destined for the garbage anyways (water damaged)
Leftover shingles from the shed
$12 in rope lights

Worth it to keep two cats from freezing to death, even if they aren't mine. And the added benefit? A cat will never defecate near it's nest when food is present or mark the territory directly beside it because the scent attracts scavengers and predators. I can't do anything to keep the cats from marking the corners of the yard (that would be the big tomcats we see all summer long) but a small sub-level male and a female will do what they can to avoid confrontation. So that means no little surprises in the garden anymore, and I haven't found any evidence of marking anywhere (should be easy enough to see on white snow :P ) Plus, the woodpecker that frequents the backyard and keeps drilling holes in the soffit and fascia on the sides of the house is keeping his distance now :)

Sunday, November 14, 2010

Hrm...

Backyard monsters is generating critters so I can go invade someone else's yard, so I'll take a few minutes here for a short post!

No piccies this time though.. if I get a chance I'll put up a shot of the subject of this particular update, but it seems anything more than 4-5 pictures in a single blog and everything starts to mess up. Annoying, but I guess that's what you get for a free service :/

I've been playing for a few years now with the idea of smoking meat and other edible goodies. A few years back my Mom gave me a small outdoor roaster/smoker for Christmas and while it actually works quite well, it's intended for larger, solid roasts. My attempts at jerky in it resulted in jerky dust and other not so edible tidbits.

So when I changed out the dishwasher in the house, I saved the old shell (steel with a burner at the bottom) and was working on converting it into a smoker when up popped a full size one on Freecycle. I jumped at the chance, and had it home in the yard the next day.. It's a full size metal fridge, with a metal interior and fiberglass insulation. The only thing that was plastic was the transition pieces between the interior and the exterior, and they were pretty badly warped, so I pulled them out and instead used anodized steel flashing and high temperature silicone (and screws) for a much better job overall. The burner is out of an electric hibachi, and the smoke tray is an old 2 part roasting tray I found at the Salvation Army for a buck :)

Overall, I think the results are super after some trial and error. Lethbridge meat and seafood had bulk jerky cure (salt, sugar, sodium nitrite, sodium nitrate) for $4 a kilo. This was handy as you have to use it for all slow cooked meat. The nitrate/ite is present in very small amounts, but it kills off botulism, which has a nasty way of living in meat cooked slowly at lower temperatures.

Meat wise, Costco is proving a great source. $20 is good for either a whole eye of round (#1 choice) or a Sirloin tip (#2) and you get approximately 1.5 kilos of jerky from either of them. Now consider this... at the store, 120g of jerky is $8-12... so that would be $100+ worth of jerky for $20.. not too shabby :) Same goes for Salmon.. hot smoked salmon is $37 a pound (the cheapy stuff is chum salmon.. it's ok, but it's not great.. and it's been frozen :/ ) but $16 nets you about 3 lbs of premium salmon.

Processing is easy enough. Cut into 1/4" thick slabs, then cut to size and remove all the fat. Fat doesn't smoke, it just goes rancid after a few days, so the vast majority of it has to be removed. Then mix up your seasoning and jerky cure, rub it into the meat, pack in a glass container, cover and store for a day. Jerky cure penetrates at a rate of 1/4" per 24 hrs, and then it's into the smoker. For jerky, I find that long metal skewers work the best. I can hang a dozen or so pieces on each one, then drape them through the metal grilling racks so they get full exposure to the smoke.

For wood, I've been using mostly apple, hickory and pecan (love the smell of pecan!). I've tried mesquite but it's a very strong flavour. So does alder (oops.. pause for Backyard Monsters.. 6 million resources looted overall.. not too shabby!) and I haven't found a decent price for cedar chips in town yet, but I'd imagine it's the same line as pecan. 30 minutes soaking in water so they don't flare up, then on the burner they go!

Jerky : Variable amount of whole muscle meat, less fat the better.. I haven't tried ground meat yet as I need some more jerky screens before I try.. that and a pound of lean ground beef is $3.25 and a pound of eye of round is about $2 :P Not a hard choice.
- 1 1/2 tsp jerky cure per pound
- 1 tbsp jerky seasoning per pound of meat (this varies manufacturer to manufacturer.. I find 2 tbsp per lb gives a better flavour.. or.. I do a sea salt and cracked black pepper.. 1 tbsp of each per 3lbs of muscle meat)
- slice the meat into 1/4" strips, cut to width
- Lay out on cookie sheets, coat one side of the meat with the cure mix
- put all jerky into a large bowl and turn by hand, adding cure mix until everything is evenly coated
- put in sealed glass container, tightly packed for 1 day per 1/4". If your slices are a bit thick, add 12 hours of cure time
- remove, and skewer pieces so they can hang and absorb flavour
- Soak your chips and put them in the pan on the burner
- Hang the jerky, and smoke for 4 hours at 177 degrees Farenheit. A bit hotter won't hurt, but try to not go cooler.
- Allow to cool, store in the fridge. It will probably keep at room temperature, but why take the risk?

Salmon : Variable amount of Salmon. Deboned is better, but if you have to, use needlenose pliers to pull out the pin bones.
- cut to desired size, again try for 1/4" thickness
- 1 1/2 tsp jerky cure per pound
- Mix up a bowl of 3/4 cup water, 1/2 cup soya sauce, 1/2 cup maple syrup (or maple flavoured syrup), 4 tbsp brown sugar. Add your jerky cure to this
- Place fillets in a glass container, and coat fully with the brine mix. If you have to, add a bit more water and soya to the empty bowl to dissolve the sludge at the bottom, then pour it in. Make sure the fillets are fully covered. Seal the container and refrigerate for 24 hours.
- 3 to 7 hours before smoking, remove salmon, place it on a cooling rack over a cookie sheet and lightly cover with tinfoil. The air will cause the surface to form a coating that will preserve moisture.
- Soak your chips, start up the smoker, place the chips on the burner.
- Place the fillets on greased racks in the smoker.
- Smoke at 200 degrees Farenheit for 4 hours.
- Remove fillets, wrap tightly in tinfoil, then wrap in a large towel while still hot. This allows the meat to rest, and the juices to flow back in.
- Store in the fridge afterwards

Cheese : Variable amount of your favorite cheese
- slice into blocks no more than 2 inches thick in 2 dimensions.. 2x2x4 for example
- soak your chips, and start up the smoker with the chips on the burner
- Smoke at _NO MORE_ than 100 degrees Farenheit for 2-6 hours.. 80 degrees is better, but very hard to maintain
- Once finished, put the cheese into a freezer bag and seal it, then put that bag into another bag and seal it too. Toss it in the fridge for 8 days. This allows the smoke flavour to penetrate deeply.
- This has the added benefit of letting the cheese live longer in the fridge it seems. The last I tried was aged cheddar, and smoked it over a month ago. As of now, there are still no fuzzies growing on it or discoloration, so I'm thinking the thicker skin that is created when you smoke the cheese is quite beneficial!

Pastrami : 2 pre-made corned beef briskets (Wal-Mart, Superstore and Safeway have them here in Lethbridge)
- wash the briskets in cold water! The corning process makes them obscenely salty, so you need to get rid of some of this first. If this still isn't enough, soak them for 4 hours in cold water to draw some salt out.
- Trim all the fat off. Each brisket usually has a large fat pad on the bottom. Ideally, buy the ones that don't have as much of a fat pad.. you get more pastrami that way :)
- Tenderize each brisket by stabbing the heck out of it with sharp meat fork
- Prepare your pastrami rub. 3 tbsp cracked black pepper, 3 tbsp ground coriander seed, 3 tbsp garlic powder, 3 tbsp brown sugar
- Lay each brisket out on saran wrap and coat all over with mustard (any kind works.. it doesn't actually flavour the meat at all)
- Evenly coat the briskets with the rub on both side, make sure you get the ends too.
- Tightly wrap in saran and store in the fridge for at least 12 hours.
- Soak your chips and fire up the smoker with them on the burner.
- Smoke the pastrami directly on the racks (lightly oiled) for 3 hours at 200 degrees Farenheit.
- Remove, wrap tightly in tinfoil and replace. Cook for 2 more hours.
- Remove and wrap tinfoil packets in a towl, let stand for 1 hour.
- Refrigerate and enjoy! (Much easier to slice when cold btw)

That should work for now :) More recipes and pics to come in the immediate future :)

Tuesday, November 2, 2010

Pumpkins, pumpkins everywhere!

Ok.. having major trouble posting images to my blog.. however.. I'm going to try linking them from photobucket and we'll see if that works properly or not.. For some reason, as soon as I pass 4 images in a single post, it starts randomly eating photos and won't let me resize them.. That's what I get for using a free blog site I guess. Just click the links to view the pictures directly from my photobucket account! These are my pumpkins from the past few years..


Tuesday, May 25, 2010

Outdoor goodies

Ooo.. a morning post before work.. scary stuff!

Courtesy of the long weekend and some free time I finally managed to finish up one of my other projects and get some pictures of it :)

As a backstory, we've had a small metal shed at this place to use for tools and such over the years. I store my lawnmower and all of our garden goodies in there, but it's been taking a beating from constant exposure to the West wind. The one wall was torn through despite reinforcing efforts, the doors were creased, the floor was rotting out and collapsing in the corners, and it was generally a mess. So the question becomes spend the time and money to repair the thing, or just get rid of it and build something that works better, in a better part of the yard? I opted for the latter, and our landlady agreed.

An hour with the saber saw and the old shed was off the rotted floor and partway loaded into my trailer (Ian came by later and helped me load it fully. It was freecycled to a family on the Northside that had nothing to put their things in and no space in their budget to buy one). The floor was as bad as I feared, but the underside explained the problem fully. Instead of leveling out the grade, putting some gravel for drainage, using skids and the like, someone cut slabs of 2x4 and dropped the shed onto them. Needless to say they were so sunken and rotted that the floor was sitting on wet dirt all the time, and the rot just took it's course from there.

For the new shed, I picked a spot behind the house, sheltered from the wind with a decent grade for drainage. It's a damp spot in the yard, but I leveled out the grade, and set enough gravel that the space can drain. The floor of the shed was made from 2x6 joists with a double layer of 7/16ths osb sheeting. It rests on a pair of 4x4 pressure treated skids with slabs of 2x6 in the corners to provide support and keep the floor from sagging.

The walls are 2x4 framing with osb exterior sheeting. I had a couple of slabs of 10mm tempered glass floating around the house so I incorporated them into the sides of the shed as windows. For the roof, I didn't want the typical truss system as I would lose most of the headroom and be back to where I was with the metal shed (i.e. stooping all the time) so it's a modified version of the way some of the package sheds are put together, and was strong enough to hold myself and Ian during shingling, so not so shabby :) Doors are 2x4 and sheeting as well.

The Saturday after the roof was up (drip edge and two layers of tar roofing paper), Ian kindly offered to help me shingle the roof. Quick work with asphalt shingles, though my side is a little wonky. I think I understand how to do it now, so it was a lesson well learned :) Finally, 3 2x4's took a trip through the tablesaw and were ripped down into stripping and painted white to use as trim for the windows and doors. If you're wondering why the trim doesn't extend to the edges of the doors, it has to do with the offset on the hinges and the fact that you can't open the doors fully if you put trim to the very edges. This works, and if I'm being totally paranoid about it, I can mask off the edges and paint a white strip so it matches ;)

Finally, some tool hangers, a storage box for my scrap wood, and we're in business :) Not too shabby, but next time I may wait for some help with the walls. Having my back lock up in the middle of the week from all the lifting didn't make for a fun few days at work :/

Thursday, May 20, 2010

To blog or not to blog..

Note to self.. (edit : 2 notes to self..) Firefox is a memory hungry excuse for a browser that they seriously need to recode... why on earth does an internet browser need 319mb of ram to run.. yeesh.. oh, and the picture upload utility on this blog site doesn't work with Google Chrome.. joy :/

Short post! I'm missing pics from my other project (probably cause it's not done yet) so without further ado, the cedar chest from a previous post!


Why does it offset these when they're the same file size, same dimensions, taken with the same camera? I have no idea.. :/

Anyways, onto new things. The next project was a complicated one, likely just due to the amount of staining it took. I was in a customer's house putting up a custom shower when I spied a piece of furniture that grabbed my attention. It was being used as an end table, probably from Ikea or something similar, but the concept was interesting enough I thought I could replicate it from real wood rather than stamped pressboard.

What it's supposed to be is a series of stacked books. Two on the bottom, four across the body one on the top. The middle opens into a full cupboard, and the top and 2nd from the bottom book are pull out drawers.

The entire thing is made from jointed 1x6 spruce, and was assembled as components. The biggest challenge for this piece was keeping the stains from bleeding onto the surrounding wood, particularly the light coloured page areas. Otherwise, it wasn't terribly hard, just very time consuming. The bookmark ribbons are 1/8th inch aluminum that I heated with a propane torch and shaped into the drawer pulls. The only concessions I made that aren't bookish are the handle for the cupboard area, and the hinges. I was considering various other options, but the books each have the spine edge router cut into them and that makes the wood in those areas thinner and a bit more fragile than normal, so most of my choices in that respect were limited. I think it turned out fairly well though :)

Monday, March 22, 2010

Easier on the eyes? Maybe...

Ok.. as much as I like dark backgrounds and the fact that they make pictures pop out nicely, there was something inherently wrong with the template I was using for this blog... the dots in the background were playing havoc with my eyes after a while, and I was seeing afterimages for about 10 minutes after reading through the preview posts checking for spelling mistakes. Sooo.... we try something new and see if it's easier on the eyes :)

This post is going to involve a few projects, two of which were smaller ones, and one larger one to cap it off. Firstly however, we'll go back to Christmas, and a little something I made for Carrie.

I had enough scraps of wood floating around at this point after making various toyboxes and cedar chests that I thought I could cobble something together that would make use of the leftovers. I wanted to use both kinds of wood, but for something that used both elements equally. What I came up with was this little seed box, just tall enough to hold packets of seeds for the garden :) It's made of crosscut cedar and spruce, trimmed to size and glued together (no mechanical joints of any kind this time... yes, the glue is just that strong). A little router work on the lid and a couple of coats of varathane (no stain this time, it didn't need it.. cedar darkens down quite far naturally, and the golden amber of the spruce was a nice counterpoint) and we have an attractive little box that made a neat Christmas present :)


Next up we have an even smaller project than this! We have an evergreen in the front yard (probably a Scotch pine) and it's been growing very well the past few years, at least to the point of the branches was overhanging the driveway by about 6 feet. Not so bad in the summer, but loaded with snow in the winter and you had to try and dodge it to get into the cars, so off it came. I had the wood stacked by the firepit for burning when Carrie came across it, and of course, the first words out of her mouth were "Oh! You can make me some of those little deer!" :P I should have guessed... Soooo, miter saw, glue and spade bits created these little guys.. they'll move out to the front flowerbed this spring and we'll see how long they last before someone steals them... (hey, they stole my sprinkler.. I don't really have high hopes here).


And finally, we've got the project that I alluded to in my previous blog post :) In my computer room upstairs I've been using half of a desk Mick abandoned here (pssst.. if you're reading this Mick *hinthinthint*) as a stand for my tv and various game systems. Not exactly the purpose it was intended for and lots of things were on the floor or floating around aimlessly. So I wanted to build myself (scary.. first thing I've ever built out of wood for my own personal use!) something that would fit all my systems and components and get them off the floor. A bit less wobbly than the desk half would be an added bonus.

The concept came to light when we were getting rid of some large slabs (15x52 10mm tempered with a polished edge) of glass that a customer had ordered to blueprint dimensions, then failed to build the showcase they were to be used for to said dimensions :P 6 of them came home with me to be incorporated into my project. What I came up with was a three tier design, using the glass shelves as key elements. Everything is up off the floor and fits quite nicely. The only trouble I had was the side rails as they're jointed 2x6's and not the straightest things in the world. 1x6 can be forced back to plumb using clamps and glue, but the 2x6's take far too much pressure to get them back to square once the blanks start to twist a bit, so despite not wanting to, I had to use a number of screws to keep everything square and tied together properly. To say some of this project is under tension would be an understatement :P Finish was accomplished by 2 coats of ebony stain, and two coats of varathane. The finish isn't perfect, mostly because this project was almost too big for the room I was trying to work in, though some spots the varathane dried to a glass like finish and overall I'm quite pleased. It serves the purpose I built it for, and I can always scuff sand and add more coats of varathane down the road if I really feel like it :)

Tuesday, February 23, 2010

An update! Wheeee!

Scary stuff.. an update in the same year as my last post... what is the world coming to? Just a short one this time, but possibly interesting.

I was looking for something to build my wife for Valentine's day, and came across the idea of a small chest of drawers (dresser) that she could store her yarn and crochet materials in. I ended up kidnapping the largest yarn package she had and what I came up with was a 7 drawer assembly, with the top drawer being much shallower than the others so it could be used to hold magazines and crochet hooks.

Material wise, it's a combination of spruce and fir. One of these days, Windsor plywood is going to have a big sale on hardwoods, and I'm going to get a trailer load of red oak, but for now, this will do. Since end grain doesn't absorb stain the same way the face grain does on a piece of wood, I always try to keep it concealed under something. This time I built a 1/2 x 1/2 veneer of fir and jointed it to the outer edges of all the spruce blanks to conceal the end grain. There's a 1 1/2 skirt at the bottom with a raised start for the first drawer. This gave me space to conceal a set of 4 heavy duty wheels that allow the unit to be rolled any direction with a gentle nudge. The drawer guides are made of 5/8" Ash (Canadian Tire for $2 per 3' believe it or not) with some very thin spruce shims to keep the drawers from slopping around.

Drawer construction was an amusing sort of procedure. I bought a dovetail kit specifically for the drawers, and despite the fact it was freezing outside the day I was working on it, the process went relatively smoothly. However I did run into one snag. When setting the depth guide on the dovetail plate that attaches to my router, the instructions say to set it at the thickness of the wood I'm working with. Easy enough I guessed, and dialed in 5/8ths. After cutting all of my joints I realized the problem however. The instructions fail to take one thing into account. when you cut a dovetail you get a set of grooves one one side, and the other has a set of cuts that look like the edges of a puzzle piece (hard to explain.. look up dovetailing if you want to see... they're tiny trapezoids). The catch is that the grooves are cut by a round bit, and the tip of that groove is round... ]]]]]]]]]]]) sort of like so... now, you try to slide the trapezoid into this, which has square edges by the way, and the furthest you can progress is the beginning of the curve at the end of the groove. Square pegs don't fit into round holes.. nuff said. The actual depth difference is about 3/16th of an inch, so it took a couple of hours with a very sharp chisel to alter all the dovetails to the point they would work. Very easy to put together however. They tend to naturally square themselves out when you assemble the drawers, so there was no trouble there. For the bottoms I threw a 3/8 rabbet bit into the router and cut a slot all the way around. A bit of tablesaw work with some 3/8ths plywood, and they dropped into place with a tiny bead of glue.

Finish wise I used the same stain as the sideboard (had some left anyways). What I wanted to do was the same sort of finish as was on the sideboard, done with the Tung oil, but I ran into a problem. Tung oil won't cure below 13 degrees Celsius. Working inside, that poses a problem because the fumes are also flammable as it's curing. So I have my wood room vented outside with a large fan and the duct to the furnace blocked off. Generally this suffices, especially since the room faces East and we have mostly West winds. With the sideboard it worked fine. However, we've had a primarily East wind for the last couple of weeks, and it caused all sorts of havoc. The temperature in the room at night was somewhere around 5 degrees, and while the first 2 coats cured fairly well, the third one was still a jelly after 36 hours. I warmed the room back up by closing the window, but the damage was done and the final coat never did cure fully. So the buffing with steel wool and paste wax became a sort of refinishing challenge. The third coat stripped off completely (Tung oil is a non stacking penetrating finish.. there should _never_ be a surface residue), but oh my God the time and elbow grease involved.. I was at it for 8 hours straight, and it would have been longer if Chris hadn't helped me with 2 of the drawers. But, in the end it had the same buttery soft finish the sideboard does, so it was worth the effort I think... Finally a bit of brass hardware, including 2 lion's head pulls Carrie salvaged from a piece of destroyed furniture (she really likes them), and some wax on the drawer guides, and we have a functional piece of furniture :) Next up, an entertainment stand (not what you're thinking I suspect.. you'll see :) )

Monday, February 1, 2010

Yech.. I really don't ever update.. ah well.. call me boring

The title says it all.. it's so true! Being completely busy doesn't really help that much.. too many things on the go and not really enough time to complete anything... File count of the "My Pictures" directory (this is where I store all of the shots I haven't even sorted, let alone edited. All of the sorted and tweaked files reside on an external drive) says 985 files dating back as far as July of 2009... Lots of good pictures, but no time to do anything with them yet... Soon though.. have to start thinking about photo competitions this summer, and I need to get a batch printed out as well. Carrie came across a very nice photo book, professionally made of photos you submit for a reasonable price. Not a bad way to display some of my work, but there comes the how to pick 50 shots from thousands of images.. talk about paring the excess away X_X. It can be done, but what a chore.. heh...

I don't really like posting my better shots online unless I've taken the time to heavily watermark them. It's far too easy for someone to right click or even screen capture and your photo wanders off into the hazy land of copyright violation. It's very common on chat sites, and I don't really want to see my work being copied thousands of times by random people. Maybe a website where if someone clicks "Save As" it deletes their hard drive.. hmmm.....

But.. I digress! Two projects this time. One of them is a bit premature in the posting because the people who need to come over and see it still haven't visited (*coughIanandWandacough*) :P but I'm sure they will eventually, so all is good. First project I have no photos of (go figure) and I can't for the life of me remember why I don't. Probably some good reason at the time but who knows.

Project #1 was a Christmas gift for my Mom. She wanted a cedar chest, so I obliged her. A trip to Home Depot for a trailer load of Western Red Cedar and an irritated clerk going "You can't put those boards there sir" (and me replying "Oh really, then turn *these* into firewood and sell the decent ones please" these being a chunk of cedar I dropped at his feet with a 4" bow in it and so saturated with water it was oozing onto the floor) and we're ready for business. I wanted to try something different this time, so the boards were planed and jointed into blanks, but I didn't do the same end caps. Instead, I stacked them all up and cut fingerjoints into the ends. Essentially, think the way the corners on a log cabin work. What you get is endgrain/face/endgrain/face in a continually repeating pattern. Huge amount of work though. Probably would have been faster with a dado blade on the table saw, but I need to make myself a sizable crosscut sled before I try that little trick. Just not stable enough for my liking. Once everything was assembled, I discovered a twist in the lid that needed some attention, so braces were attached to the underside. Now, Western Cedar is not a hardwood by any standards, so I needed to protect the surface but keep the cedar smell intact. The lid and the outside of the box were done with 8 coats of heavy varathane (think spar varnish.. about the same consistency). Inherently, the varathane is amber in colour, so add that to the red of the cedar and you get a beautiful reddish glow that brings the grain out nicely. Each coat was sanded with 400 grit sandpaper to knock off the nibs, and the entire project was finished with brass hinges, handles and corner guards. Inside of the chest is raw wood, and man, does it every smell of cedar.. not too shabby IMO :)

Next was a refinish project, rather than something built from scratch. Ian and Wanda gave us a sideboard/buffet that had belonged to Wanda's grandmother. Ian had begun the restoration, but lacking the space and time, decided to pass on the project, so it sat at my place for more than a few months pending my getting a better random orbit sander and shop vac. Timely Christmas gifts from my Mom-in-Law and Kyle/Cynthia filled this order nicely and we were off!

A few notes on this sideboard first though. Age wise, it's old. As in very old. Commercially applied dovetail joints were not in use until the 1920's. Before that, you get custom interlocked joints that could only be made with a plane (you can't cut a vertical groove, then cut a horizontal groove halfway down on _one side_ using power tools... it has to be done by hand) and that was how all the joints for the drawers were done. It's all plane work, without even a hint of power tool application. Next hint as to the age is in the saw marks left on the wood. Circular saws were used in mills starting in the 1820's. Before that, simply due to power demands, the saws were a combination of straight cut and circular blades. Leaving straight lines on one side of a board and arcs on the other. At the same time, double straight blades were used as well, leaving corresponding mill marks. This particular sideboard has rough cut boards (oak) for the drawer backs, internal bracing, and back bracing. The drawer glides inside the sideboard also have straight cut marks, without an arc to be found anywhere. Interesting eh?

Firstly, I forgot to take before pics again (duh!) but the finish isn't too hard to picture. Take a piece of furniture, toss it in the La Brea tar pits for a week, remove, and there you go. It was _black_. And not consistently either. The black crud had been rubbed in at some point, but the person doing it missed huge areas underneath, left fingerprints, blotched inside of the drawers and generally did a horrible job. Please don't argue that it was an "original finish" and I screwed it up by refinishing it... Period craftsmen did _not_ leave slimy black fingerprints on their work, and they also didn't do half of a unit and call it a day. It was done right, and mistakes were corrected. This black crap was something slapped on at some point in the past, possibly to protect the wood, and it was _not_ original finish. And to top that off, Ian told me that one of his relatives has been "protecting" the finish with... bleh.. baby oil.. for the last however many years. Talk about incorrect information. Oil maybe, but baby oil isn't a mineral base. When it dries it goes sticky, and collects crud, that that's exactly what happened.

Initial sanding was done with a random orbit sander and 100 grit paper. Whatever that black crud was was murder on sanding discs. They fouled after a half hour sanding and it was even worse using a mouse sander or detail sander. After I finally managed to get the worst of it off, the entire project was rubbed with very hot water on a damp cloth and allowed to dry so the grain would raise, then sanded again with 150 grit discs and finally 220 grit. The end result of all the sanding was the majority of the black crud lifted out of the grain, and what I ended up was a beautiful, buttery coloured wood that I'm certain is maple (especially after comparing it online). The drawers I had to basically deconstruct then glue back together. The original glue was dried to nothing, and instead of regluing the drawers, a previous owner decided to resort to nails. >.< I hate nails.. I really do.. they're a mechanical fastener that gives moisture a chance to penetrate your project. And if they start to rust they stain the wood. That being said, one drawer had more than 30 of the little bastards holding it together... and they weren't even ring nails.. they were straight nails, so of course they just pulled out, and someone kept adding more.. Morons :/ Glue, wood filler and clamps and we're back in business.

Now, for the finish, I went with a completely different option this time. Varathane is considered a stacking finish. Each coat adds progressively to the last and you get an increase in thickness. When you're trying to fit doors and drawers, this is not a good option. So I went with a different plan.. There is a product out there called Tung oil.. granted, modern Tung oil doesn't have very much of the actual oil in it, but the idea is the same. It's a non stacking penetrating finish. Up to 5mm actually, and on a hardwood it makes the surface go incredibly hard once it dries. Also, it's easily fixed if scratched. Apply more tung oil, allow to dry and then re-wax. First some colour as the amber oil on yellow finish would have made it look like a giant pat of butter. The stain I chose was Ipswitch Pine. Very traditional, and it looks good with almost anything, so I hand rubbed it to get a light, consistent stain for the entire piece. 48 hours later came the first coat of tung oil thinned 50% with mineral spirits for maximum penetration. Then every 24 hours after that came another coat until I had a total of 4 in place. Now came the hard work. The final finish is a very, very old technique that worked incredibly well. It's simple enough too, just lots of elbow grease involved. Paste wax applied with 0000 steel wool. You buff like crazy, and the steel wool creates a very fine slurry on the surface of all the dust nibs and helps fill in any spots and holes. A final buff with a clean dry cloth and the surface is incredible. It feels like silk... if it were possible to describe wood as feeling soft, this would be a prime example of it. You just can't resist touching it. There's a few deep scratches in the top that I didn't want to try and sand out completely, so I'm counting them in the character of the piece, and put a slab of 6mm glass on top to protect it.

Overall I'm very pleased with the results (and I think Ian and Wanda will be too :) )
Project tally - Cost : $~100 (sandpaper, finish, brushes, rags, etc)
- Time : ~90 hours (that black finish was truly unreal.. whoever put that on deserves a swift kick in the head) (and I just noticed in the pics I have 2 of the drawers in wrong.. whoops :P I'll just go fix that now....)